“Who’s in charge of this thing?” I asked no-one in particular.
Joanna, ever vigilant, told me to talk to Will. “He’s grumpy.”
Will wasn’t that grumpy. I mean, he’s a little grumpy. He isn’t the least grumpy person I’ve ever met. On a continuum of grumpiness, he’s above average. But he gave me an overview of how the MakerBot works, explained extruders and filament, pointed me at Thingiverse, and said “have at it!”
I discussed what to print with my ping-pong hitting partner, Alex. He builds our iOS apps. Should I print an Eiffel Tower? Should I print a phone case? Should I try modeling something myself, and if so, what? How many tiny TIE Interceptors could I print with three half-used large spools, and would that be enough to fend off tiny rebel assaults?
We decided to try printing a ping-pong paddle. We exported ScurtWad’s model from MakerWare at the default settings, and pressed print. Our eyes filled with wonder as the bot sprang to life.
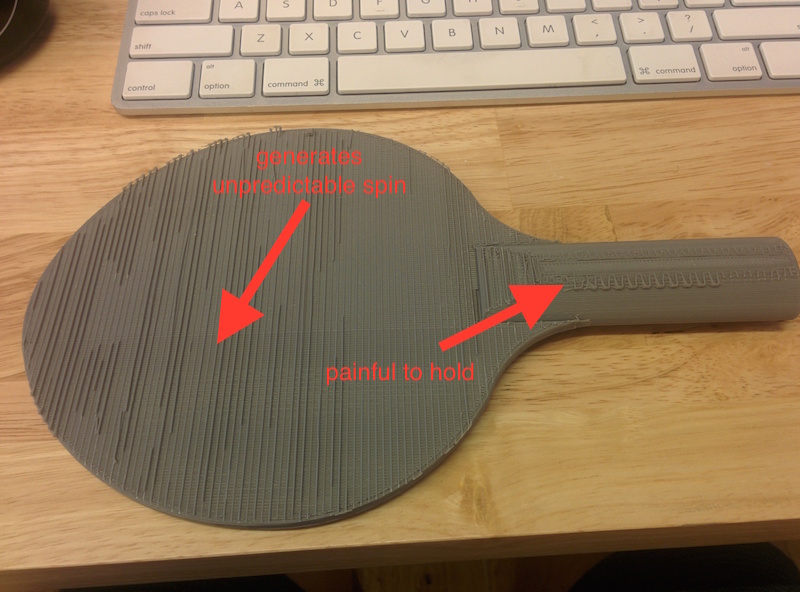
Our first print was an epic fail. We refer to it as the ramen paddle.
The problem was that the model, oriented like this, needs supports. Without supports, the extruder extrudes into empty space. Who knew? It filled that empty space with a spaghetti-like structure.
First Steps
We had a couple laughs, played a round or two with the worst paddle ever made, then tried again. I checked the “supports” checkbox, re-exported the print file, and fired up the bot.

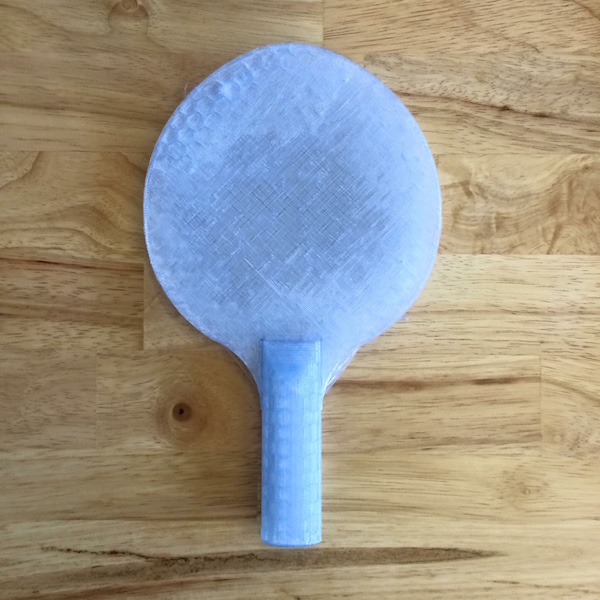
This one came out better. But the side we put supports on was too rough, and it’s a little egg-shaped:
Will made two suggestions: first, alter the model to make it rounder; second, orient it on the build plate diagonally. By doing so, it would need fewer supports, and they would attach to the side rather than to the face. Instead of following his advice, we decided to stop printing ping-pong paddles.
A Little Branding
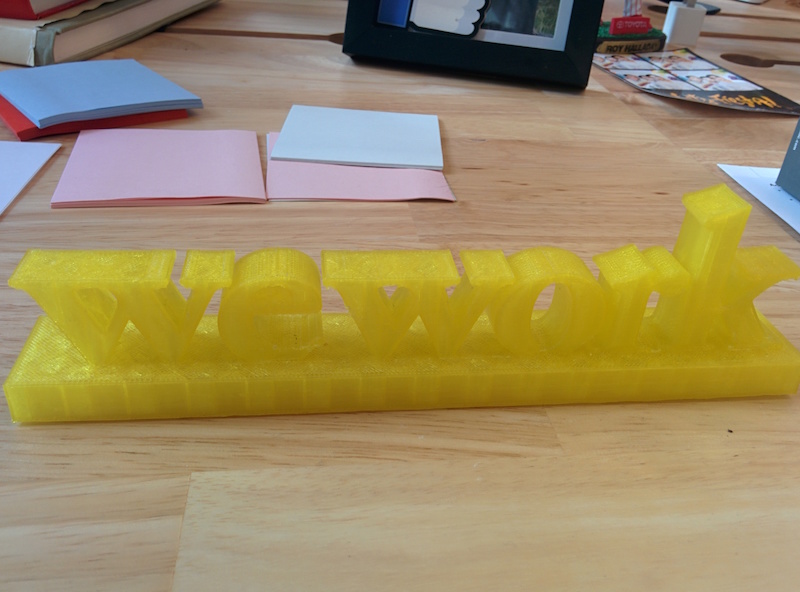
With a couple failures under my belt, I decided it was time for a win. I asked Will if he could create a model of a WeWork logo that I could sit on the top of my monitor. He said it would be a piece of cake, he just needed to know the thickness of my bezel, and a copy of our logo in vector format.
So I asked Tracy, one of our amazing designers, if she had a version of our logo that Will could use. And indeed she did! She exported an .eps that Will imported into Rhino. There he extruded it, boolean union-ed it with a little sled, and exported an .stl. We imported that into MakerWare, added a raft and supports, exported the .x3g onto the SD card, and printed it:
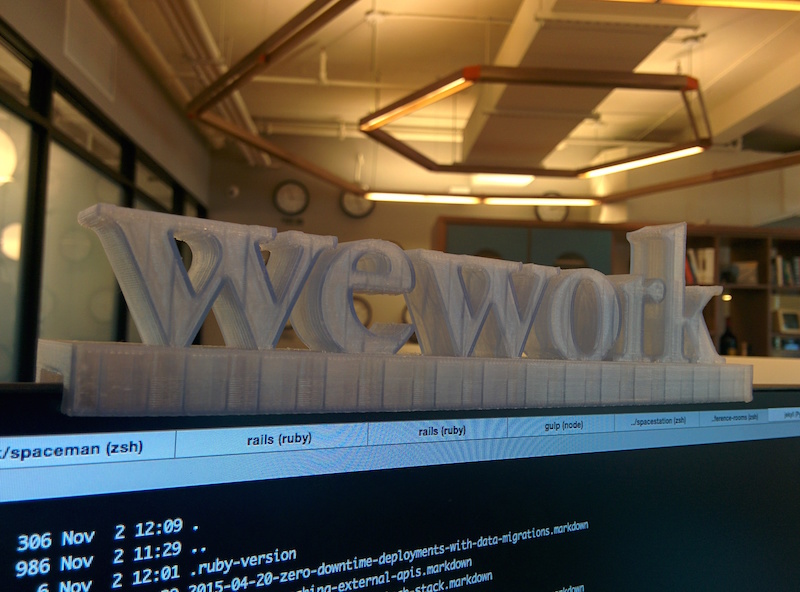
Picking the supports out of the letters is annoying, but it’s one of my favorite models, and popular around the office:
Other people started printing them, and now they’re in the strangest places:

If we modified the raft a bit, we could print it on its side so it wouldn’t need supports. Project for another day.
WeEnclose
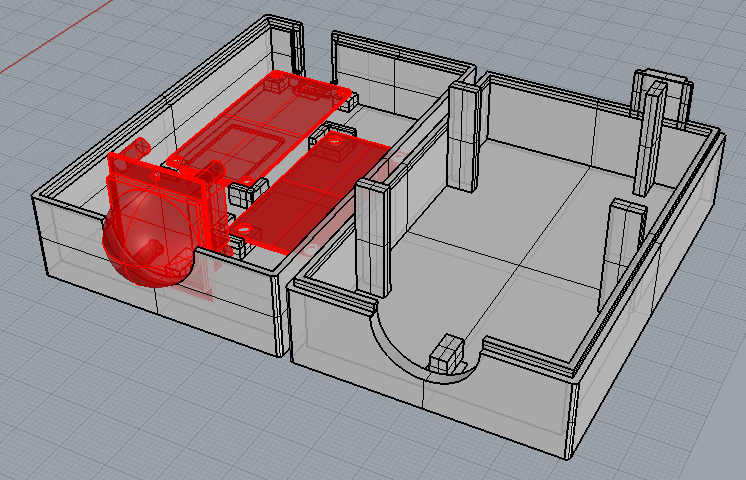
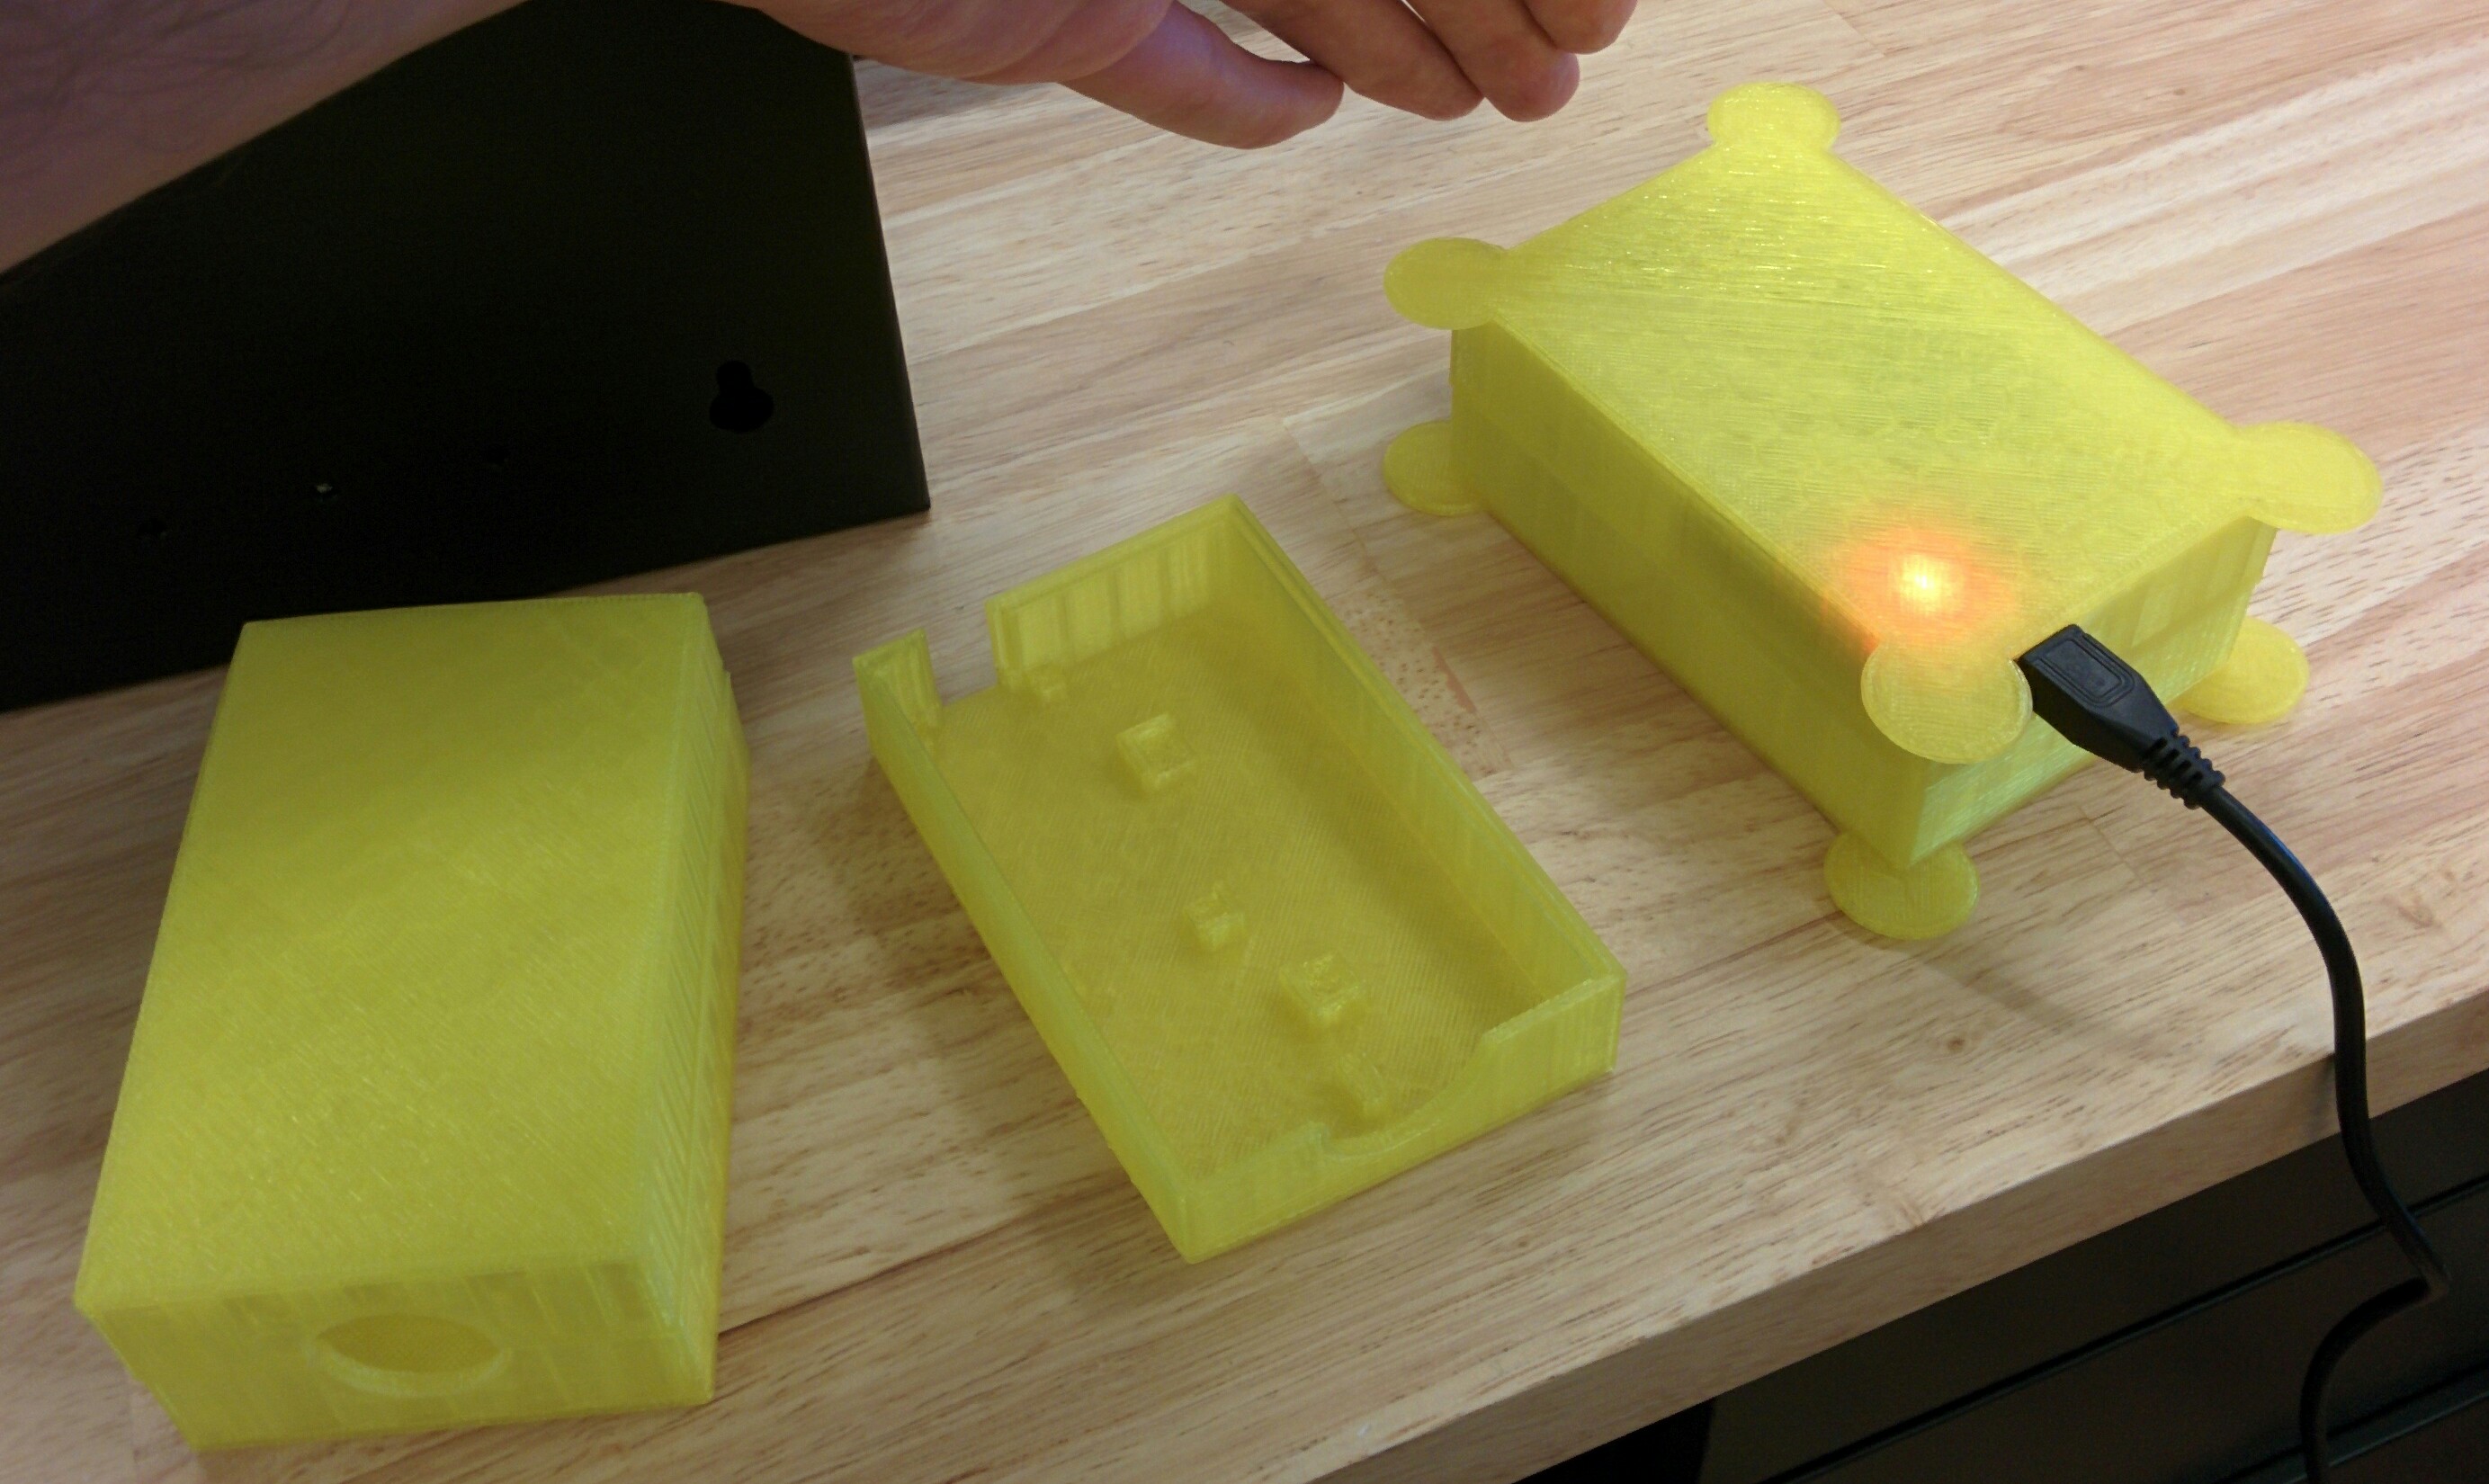
It was at this point that Emiliano on our physical technology team approached me with a proposal. He and I had worked together during our last hack-a-thon. Our team had integrated a WiFi enabled infrared sensor with our conference room system. He wanted to field-test the sensor, but couldn’t find a case that would fit the motley assortment of circuitboards:
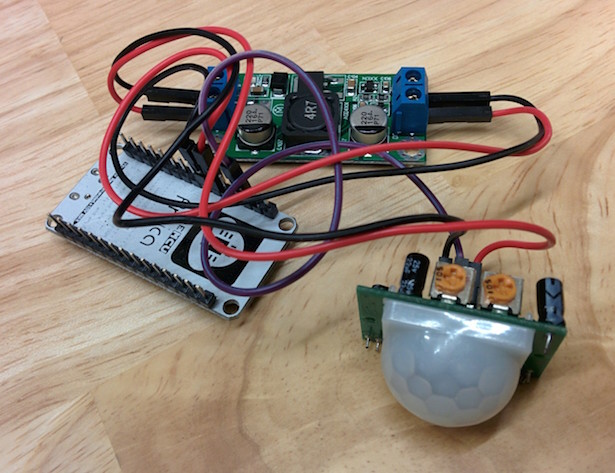
“I see you’ve been using the MakerBot - do you think you could make me a box?”
I had no idea how to make a box, but I lied and told him I would do my best. I downloaded the free trial of Rhino for Mac, read some tutorials on how to make clam-shell enclosures, and went at it.
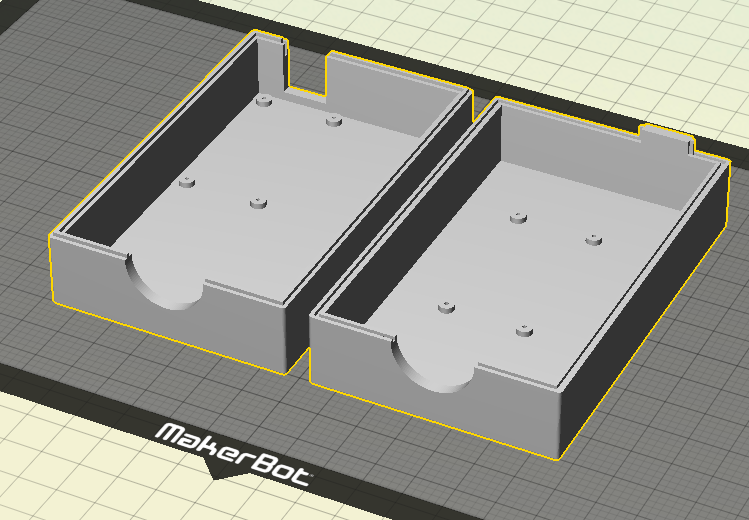
My enclosure had a hole big enough for the IR sensor, little feet for the two other circuitboards, and a matching 1mm ridge and trough on the top and bottom. It was glorious:
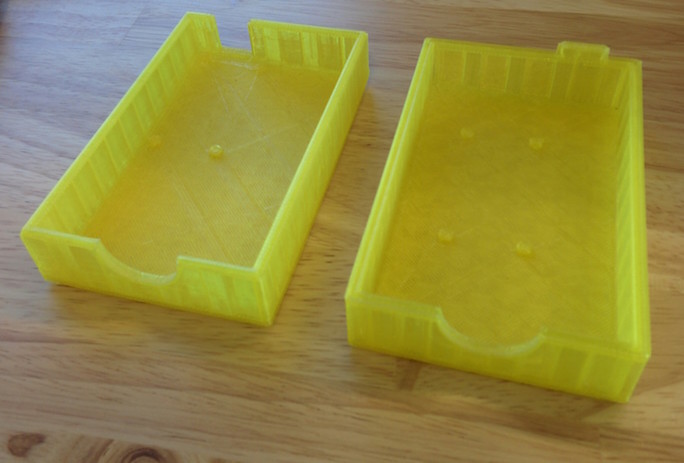
Coming out of the bot, it looked OK:
It had problems.
- the ridge/trough
- didn’t work at all, I couldn’t close the case
- the bot’s tolerance isn’t good enough to make 1mm parts fit together
- the circuitboard feet
- weren’t tall enough to accommodate the circuitry on the backs of the boards
- the screw holes I modeled didn’t come out as holes so much as gnarled bits of plastic
- the IR sensor
- there was nothing to prevent me from pushing it back into the box
- the box itself warped
Rabbets and Feet
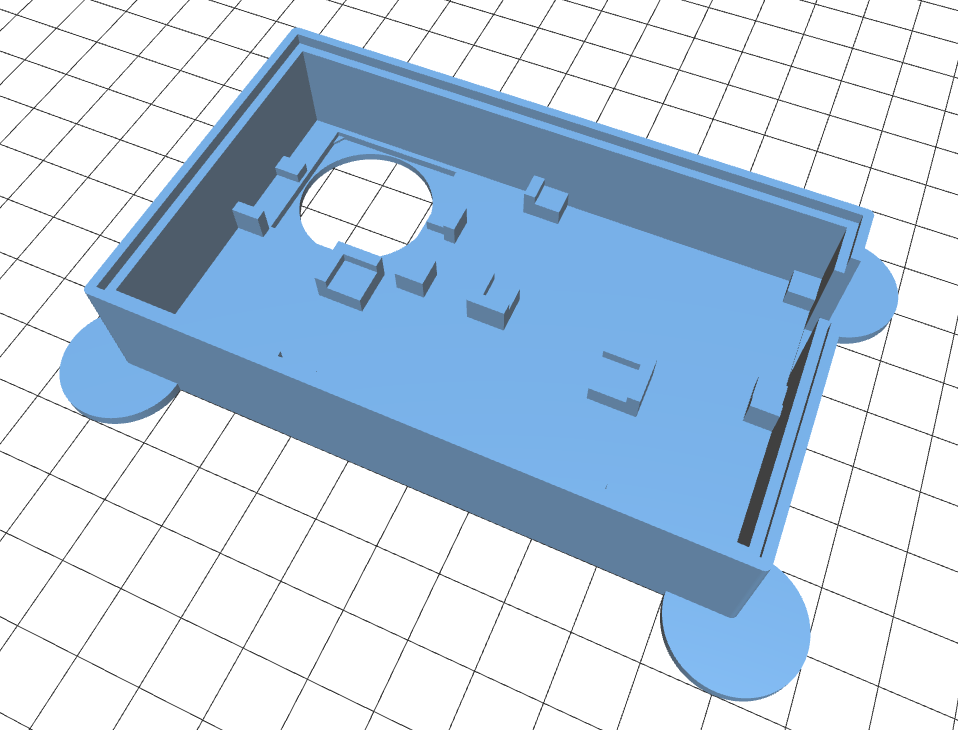
I was out of my depth. Fortunately, I had a secret weapon. And that weapon was a handsome southern man named Zach. The first thing he suggested was to replace my 1mm ridge/trough with a larger rabbet. I didn’t know what a rabbet was, I thought he said rabbit. He explained it to me like I was 5; they weren’t the same thing at all.
I redid my model with a 1.5mm rabbet, actually modeled the circuitboards so they fit, and added a back-stop for the IR sensor:
It was a big improvement:
- the circuitry fit better
- the case snapped shut beautifully on account of the rabbet
- the IR sensor didn’t fall back inside when I poked at it
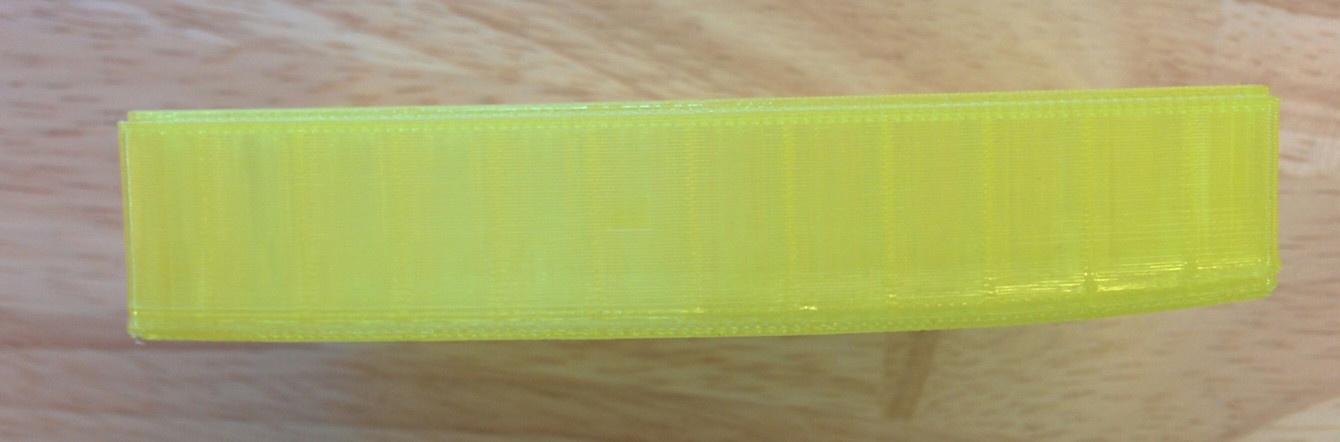
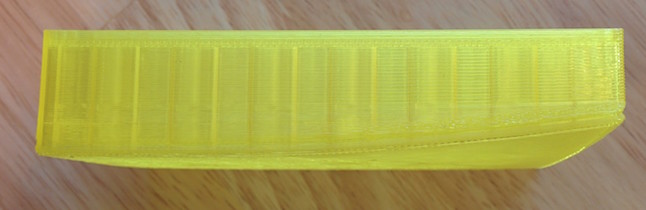
But the warping was getting worse:
I wondered if our warped build plate was warping the model. Zach said the plate wasn’t the culprit; the raft should compensate. The issue was that tension builds up in the filament during the print, causing the edges to pull in and up.
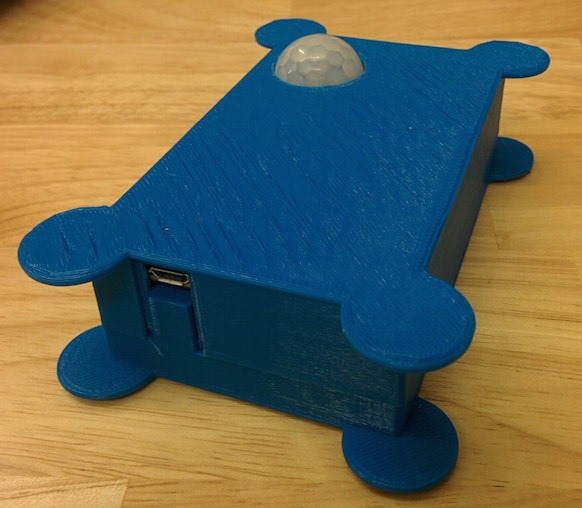
He said one approach to this problem was to add little nickel-sized feet to the corners of the model. The feet might pull up a little bit, but their diameter is small so the warping would be minimal. And I could just cut them off with an x-acto knife.
So I added some cute little feet to the model. Added bonus: when I checked the new version into our repo, Will pointed out that github was doing pretty sweet previews for .stl files:
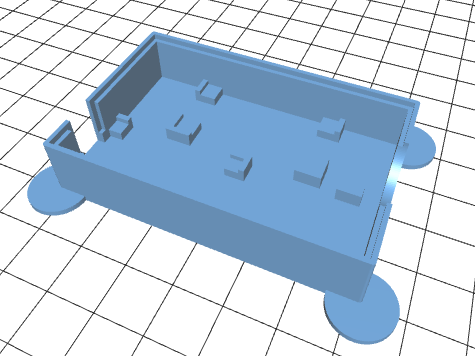
This one came out great! Everything fit, we could see the notification LED through the case because we used translucent filament. It lights up when the IR sensor detects heat!
The feet not only improved the quality of the print, but also made it easier to pull the case open. And were kind of adorable.
Iterating Quickly
Emiliano asked for another version of the case with the hole for the IR sensor on the bottom instead of on the side. Because I’d modeled the circuitboards, it was easy to make the modification.
We ran out of the translucent yellow filament, so I printed it in blue instead:
Look at those cute little feet!
Wrapping Up
We’ve had so much fun with our MakerBot. Aside from enclosures, we’ve been printing so many different things.
If you want a nice one, Zach and I (mostly Zach) made some helpful modifications to an iWatch stand:

Happy printing!